This post contains affiliate links. If you make a purchase from one of the links, I may earn a commission at no extra cost to you.
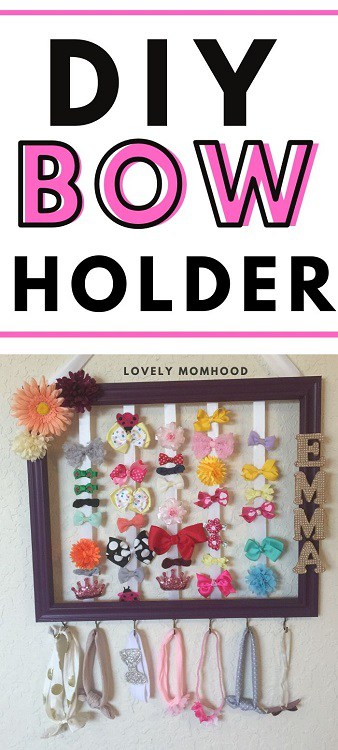
DIY Hair Bow Holder and Headband Holder [Tutorial]
Hair bow holders are really easy to make and today I will be walking you step-by-step on how to make this adorable and easy DIY hair bow and headband holder. When I found out I was pregnancy with a girl, one of the first projects I worked on was making a DIY bow and headband holder.
Not only was it so much fun to make, but it turned out less expensive that purchasing it custom made.

So, why make a DIY Hair Bow Holder?
Well, because it a whole lot of fun to make, but also, because:
- It keeps the bows organized and away from the floor
- It saves drawer space
- You can customize it with your daughters name and her favorite colors
- It showcases the bows and headbands making it easier to choose one to match an outfit
- The bow holder itself serves as a beautiful all accent piece
- Custom hair bow holders can be pretty pricey
- You can use it to display other things such as photos or small art work
DIY Bow Holder Materials and Tools
The following are the list of materials that I used to make this particular DIY hair bow and headband holder.
However, feel free to make changes to fit your preference in style and design.
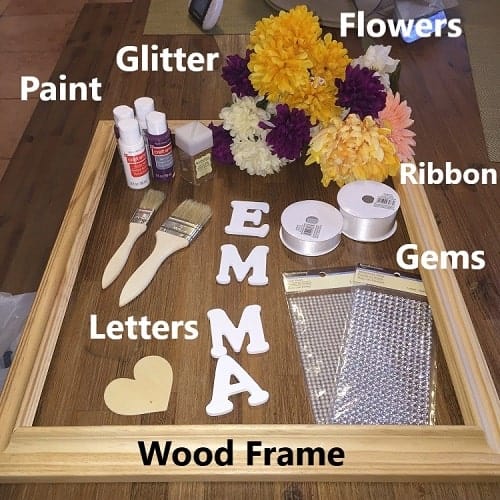
Materials:
- a wood frame
- small wood letters
- ribbon
- paint
- glitter
- flowers
- cup screw hooks (optional, for head bands)
Tools:
- stapler
- paint brush
- hot glue gun
- scissors
How to make a bow holder (Tutorial)
1. Paint the wooden frame

If you bought your frame with the color of your choice, then you can skip this step.
Otherwise, paint your wood frame with the color that you wish.
Depending on the frame that you use and the type of paint, you might have to give multiple coats. My frame for instance, took 3 coats of paint to achieve an even look.
2. Decorate you letters
While your frame dries you can start to decorate your letters if you are opting to display your daughter’s name on your frame. There are multiple ways you can do that…
Here are some ideas:
- brush liquid glue and sprinkle glitter
- paint them with the color of your choice
- stencil in a design
- add a texture (e.g. gems)
I opted for glitter and these embellishment stickers.

All I did was spray glue on the letters, sprinkled the glitter, and once dried, I applied these pearl stickers to fit each letter.

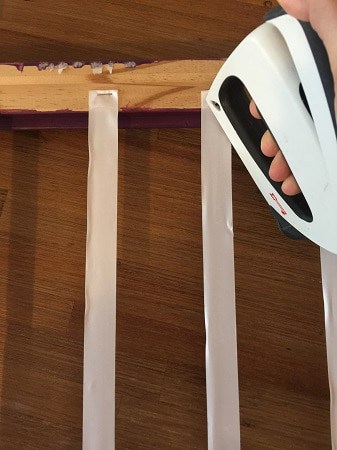
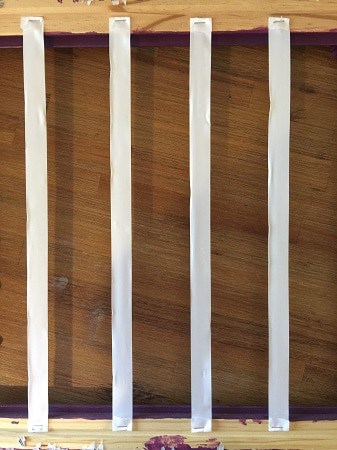
3. Staple the ribbon strips
Once the paint has dried in your frame it is time to add ribbon strips.
To do that, simply turn the frame over, and measure the distance from top to bottom. Then, cut as many ribbon pieces as you wish to use for your your holder.
To secure the ribbons to the back of the frame I used a stapler.
Make sure you pull the ribbon tightly before securing with the staple. Doing so will ensure a tight grip.
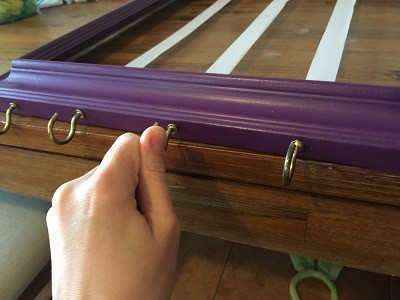
4. Screw in hooks
If you are opting to put hooks in your bow holder, now is a great time to put them.
The hooks I purchased were sharp enough, which allowed me to screw them on with my hand without the use of a drill.
These hooks are a great addition to your DIY bow holder if you are looking to also hang headbands from it.
Also, the amount of hooks you use in your hair bow holder is totally up to you.
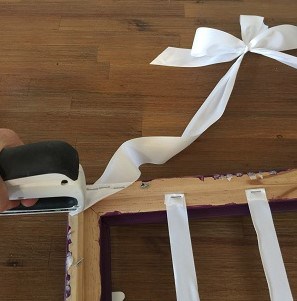
5. Make a frame holder
The way you display your hair bow holder is up to you.
I opted to crate a ribbon holder made out of the same color ribbon I used to create the ribbon strips. However, I opted for a wider ribbon for additional support.
Other options to hang your bow holder are:
- Burlap ribbon
- Rope
- Yarn
- Metal
All you have to do is cut 2 long string of ribbons. Then, staple one strip to each top back side of the frame. Once secured at each side, make a bow with the two loose ends.
6. Attach your flowers and your letters
Now that your bow holder frame has its ribbon strips, hooks, and holder it is time to attach the rest of the details.
For this hair bow holder I opted to decorate it with a few flowers and the letters I had previously decorated.
All you have to do, is attach the flowers of your choice one at a time using a hot glue gun. Although you can glue them anywhere in your bow holder frame, consider placing them in a corner so that you have room on the other side to add your letters.

Once the flowers are placed in the location of your choice, hot glue your letters on the opposite side.
You can also opt to glue the flowers at the top of the frame and the letters at the bottom of the frame.
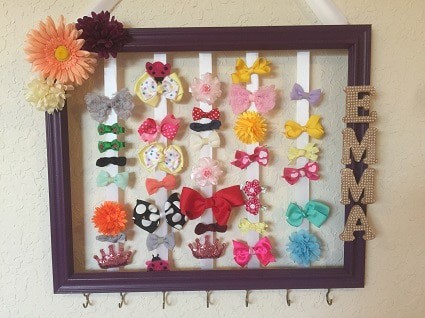
7. Add your bows and headbands!
You did it mama!
It is time to add your beautiful bows and display your beautiful art piece.
Additional info
As your daughter grows, her bow holder can grow along with her. Over the years you can give it a fresh coat of paint and embellish it with things that she develops interests in.
For instance, the hooks in the bow holder can later be used to hang bracelets and necklaces. Or when she grows out of bows, you can use this piece as an picture display by hanging pictures in the the ribbon strips.
I hope this is a keepsake you and your daughter love and use for years to come.
So, will you be making your own DIY Hair Bow Holder?