This post contains affiliate links. If you make a purchase from one of the links, I may earn a commission at no extra cost to you.
The Perfect Homemade Playdough Recipe (Safe and Non-Toxic)
Have you been looking for the perfect homemade playdough recipe? Well, my friend, look no more. Today, we are discussing making the best homemade playdough without cooking it.
I will also share some tips and tricks about homemade playdough making and answer some frequently asked questions about homemade playdough.
After a few attempts at trying out a few playdough recipes along the way, I noticed that none of them were quite “it”.
So, I set out to make the perfect playdough recipe by adding “just right” ingredients and measurements that will make your playdough the ideal consistency.
Let’s do it…
The Perfect Homemade Playdough Recipe

Homemade Playdough Ingredients
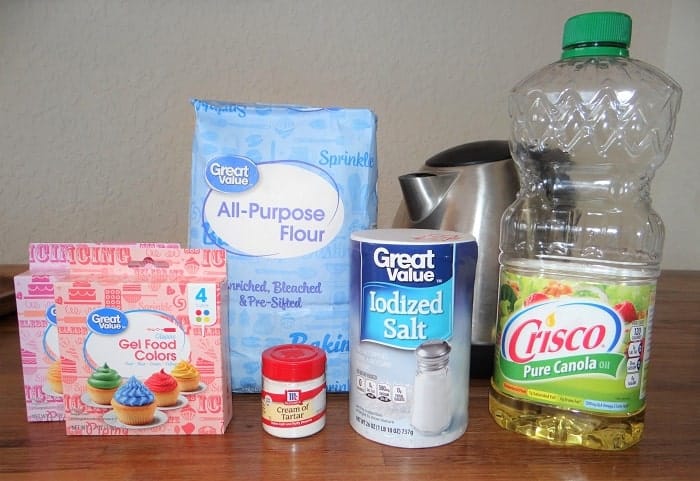
- 2 cups flour
- 1/2 cup salt
- 2 tablespoons cream of tartar
- 2 tablespoons of oil (canola or coconut)
- 3/4 cup water (hot or boiling). Note: you can heat up 1 cup of water in case you need to add a few more splashes extra to achieve the right consistency.
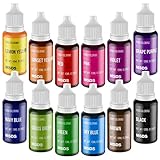
- Food coloring
- zip-lock bags
Instructions
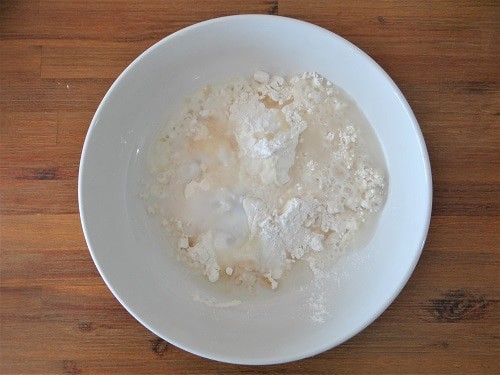
STEP 1: Add Ingredients
- In a bowl, mix all of the dry ingredients together.

- Then, add the oil and boiling water to the mix. If you need to add a few more splashes of water, please do so.
Step 2: Mix Ingredients
- With a spoon, mix all of the ingredients in a bowl
- Once mixed thoroughly and the mixture is warm (not hot), mix by hand
- Roll the playdough a few times on a flat surface using both hands (like pizza or bread) until thoroughly mixed and soft.

Note: Caution with the boiling water and the kids if they will be helping you. The playdough consistency should be perfect. But if it isn’t as smooth as you would like it to be, you can always add an extra splash of oil.
Step 3: Divide the playdough
- Divide the playdough into four equal parts
- Press an indentation in the center of each piece
Note: Only divide the homemade playdough if you plan to make different color batches. You can skip this step if you are only making one big batch of the same color.
Step 4: Add the food coloring
- Place a few drops of food coloring in the indentations you made on each dough batch

- One by one, roll each playdough batch until the color is thoroughly mixed into the playdough.
Note: Consider wearing disposable gloves if you don’t want to stain your hands/nails. However, food coloring doesn’t stain too badly. Add more food coloring if you want a darker shade of a particular color.
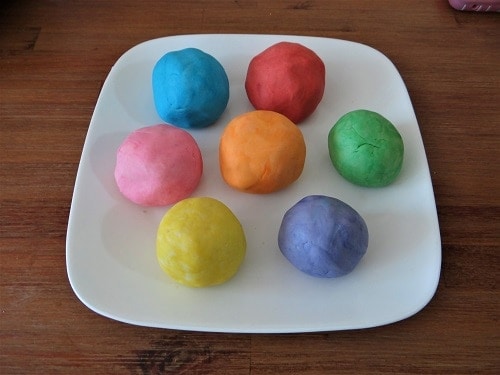
Step 5: Voila!
You should have beautiful and soft batches of colorful homemade playdough.
Now, the kids can use it how they want to, plus it makes a great indoor activity.

Note: Ensure the homemade playdough batches are stored in zip-lock bags or an air-tight container when not used. That will prevent it from drying out.

Tips and Considerations
It is easy to make this homemade playdough recipe; however, there are always some tips and tricks you can implement to make the process smoother, especially if this is your first time making it.
So, here are a few things to consider when creating your first homemade playdough batch:
Ingredients Substitutions
The ingredient list I shared with you earlier is not set in stone. Feel free to substitute any of the ingredients for other versions of the same stuff.
For instance…
Oil: You can use any cooking oil you wish. I used canola in all of my attempts, but you can also use any other, like coconut oil. I will try coconut oil next time. I would hope it gives the playdough a coco-nutty smell.
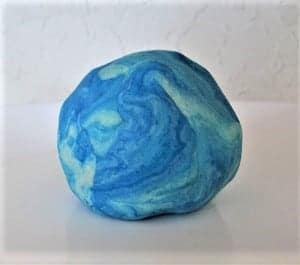
Coloring: Food coloring comes in different forms. Many people use liquid food coloring, but I used gel food coloring. The gel food coloring gave the homemade playdough a beautiful marble finish during the first few mixes. That was a pretty touch (images below).
Water Temperature: I ended up opting for the boiling water. Although I am pretty sure hot water would do just fine, the boiling water helped the ingredients mix better.
Don’t complicate yourself.
For this tutorial, I opted to make different color playdough batches.
But you can opt to make a big batch of just one color.
Have fun with it
Your kids can do many fun things once your playdough is ready.
Add glitter!
All you have to do is add your desired glitter amount to each batch and work it into the playdough.

Here is how ours turned out. Our favorite was the blue playdough with blue and silver glitter.


Try using gel food coloring.
As I mentioned before, using gel food coloring gave the playdough a beautiful marble finish during the first mixes. So that might be something you might want to try.

Homemade Playdough FAQ’s
Can I make homemade playdough without Cream of Tartar?
Yes. Other recipes call for corn starch, Jell-O, and other alternatives. However, I found the Cream of Tartar to be the best alternative to achieve perfect consistency. Just buy a good amount on your next grocery visit or order it from Amazon and make homemade playdough repeatedly at no extra cost.
How do I keep my homemade playdough from drying out?
This homemade playdough is very versatile and forgiving. But you can keep it at its best by storing each batch in a zip-lock bag or an air-tight container to help it keep its moisture.
If, at any point, it becomes a bit dry from prolonged exposure to air, just add a small splash of oil, and it should help bring it back to life.
How long does homemade playdough last?
The time it will last depends on how well the kids care for their homemade playdough.
But typically, with this homemade playdough recipe (assuming it is stored away correctly when not in use, your dough should last weeks/months.
Why opt for homemade playdough vs. store-bought playdough?
There isn’t anything “wrong” with store-bought playdough. We have bought it multiple times.
UNTIL we learned to do it ourselves.
The recurrent expense of buying store-bought playdough that will dry out by the second day is no longer an attractive option.
Instead, we can make our own over and over at no expense (only a small initial investment of ingredients).
What’s more, this homemade playdough recipe is simple, safe, natural, and perfect for keeping the kiddos entertained at all times.
Other reasons to opt for this homemade playdough recipe:
- it is natural and safe
- it’s inexpensive
- lasts for weeks/months when properly stored
- you can customize the appearance (color, glitter, patterns, etc.)
- it’s a fun project for the kids to do
- it enhances and promotes their sensory and imaginative play
Is there an alternative to food coloring or dyes when making homemade playdough?
Yes, absolutely.
If you would rather not use any artificial coloring, try using beet, spinach, and/or carrot juice.
★ Related Articles:
- 37 Fun Indoor Games and Activity for Kids
- 7 Super Fun Easter Egg Games
- 23 Best Gifts for Toddlers for All Developmental Stages
Final Thoughts
This is the best homemade playdough recipe I have ever made.
I hope you and your children enjoy making as much as we do.
I would love for you to try it.
Will you be trying this homemade playdough recipe? Tell me what you think about it…
Oh and don’t forget to pin it for later, so that you can made homemade playdough over and over again!
Bestseller No. 1